We assume, you already setup and enabled this payment gateway from the ‘Default Settings’ section. If not then please go back to the ‘Default Setting’ section to enable the payment gateway.
Let’s take a look how you can enable / add a new coin to the payment gateway. Click the menu ‘Add New Coin’ from the menu section. You will see the following section:
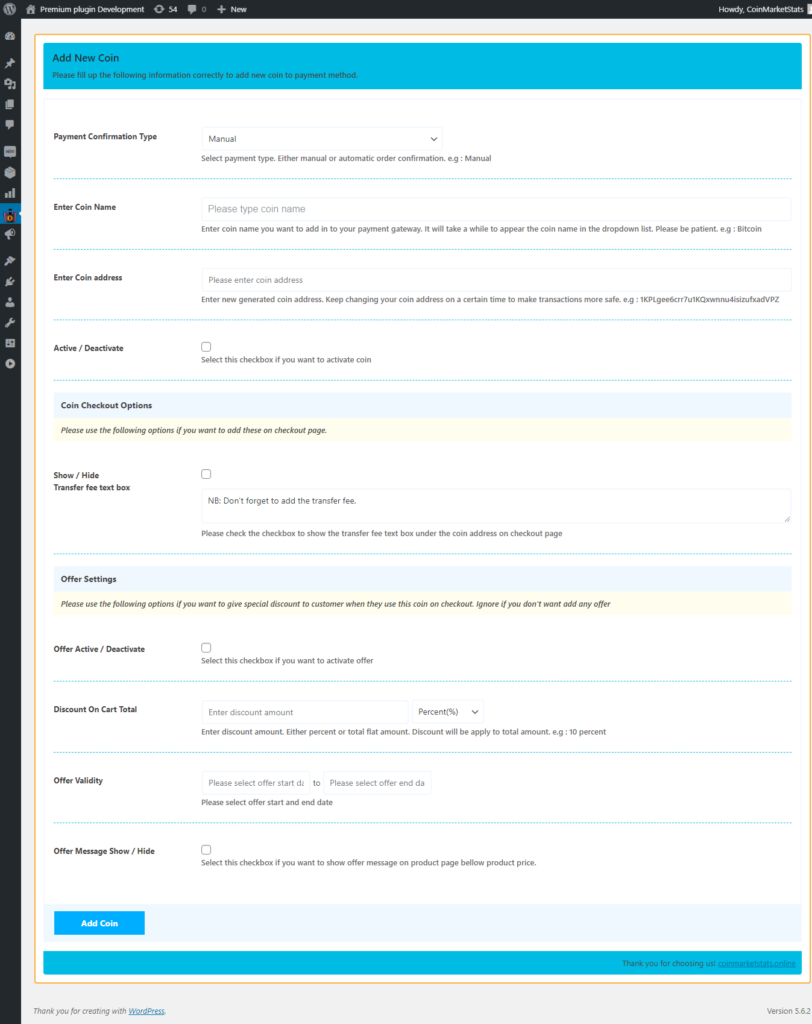
The first field is for order type. If you don’t know what is this please click here to read the payment options provided by this plugin.
So,
- Select an option from that field, let’s assume manual.
- Then enter the coin name you want to get paid. Enter your coin name and wait for few seconds to get verified that the coin is registered with this plugin or not. You can see a loading circle in the right side of the field. if it can find your coin a dropdown will appear. Select your coin from the appeared list.
- Then enter your coin address from anywhere you want.
- Click the checkbox for ‘activate / deactivate’ field’s.
- That’s it, click the ‘Add Coin’ button from the bottom section. You are done! your coin is added to the payment gateway and user can pay on that coin.
We will discuss the other fields on the bottom of this settings page on How to add discount on a specific coin? section.